Having something homemade for a birthday celebration adds an extra special touch to the celebration. There’s something so fun and festive about this simple birthday banner and yet it is so simple to put together.
Create a personalized birthday banner for a friend or relative for their upcoming birthday celebration and they will surely feel the love! Additionally, the birthday person can also keep the banner as a memento of that special day.
During the planning process, you might want to consider the theme of your birthday party in order to make the banner look appropriate for the celebration. This can be done by modifying the colors, the paper patterns, the flag shapes, and the letters in your alphabet.
Also, again taking into consideration the occasion for which the celebration is, you could make extra card stock “tabs” with flowers or any other pertinent decorations.
There is no need for fancy cutting tools, so this project can be made utilizing the supplies that you already have in your supply cabinet, as well as paper, stickers, and embellishments.
First, cut the card stock
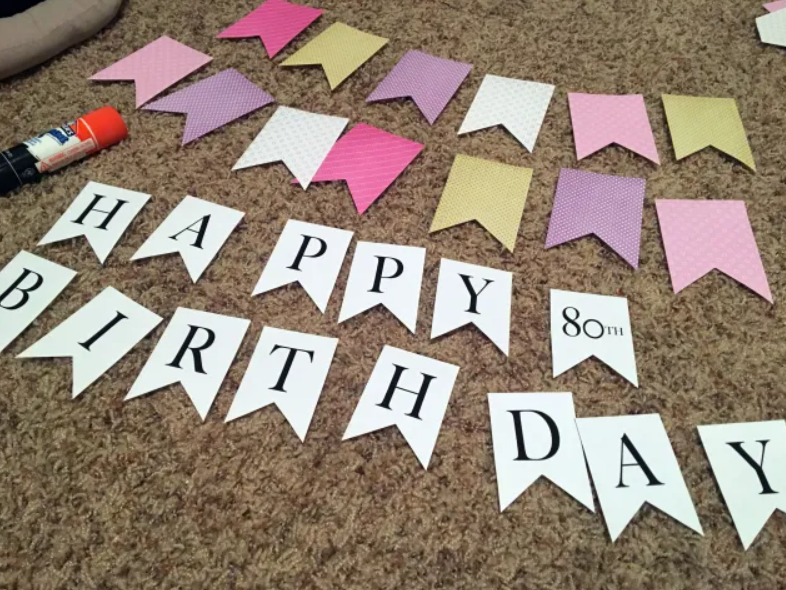
The first thing you will need to do is cut your card stock. You can simply cut your 8 1/2-inch by 11-inch sheets into quarters if you are working with standard 8 1/2-inch by 11-inch sheets. With a ruler, mark the halfway point of the long end of the sheet along which your first cut will be made, cutting it directly in half. It is also necessary to cut both of these sheets in half, creating four quarters. Each of these quarters will be approximately 4 1/4 inches by 5 1/2 inches.
Cut the Paper That Has A Patterned Print
Cut the patterned paper so that the pattern and color of it can serve as a highlight on each banner flag. It is best to cut out from your patterned paper pieces that are approximately 4 1/4 inches by 2 inches.
Glue the Pattern
The backside of the patterned paper should be glued down to the solid color paper by using a glue stick. Attach the patterned paper to the one end of a plain piece of the solid colored card stock, making sure all of the edges are aligned. It is important that you press firmly along all the edges to ensure that it is secure.
Letter and Punch
Adhere one letter to each flag of the banner, arranging the letter in the middle of each flag and placing the patterned paper at the bottom of each flag. You will need to apply one letter of Happy Birthday to each of the flags, whether you are using stickers or writing with a marker. After the letters have been applied, punch a hole in the top corner of each flag on both sides, using a hole punch.
In case you don’t have alphabet stickers on hand, you can simply write a letter on each flag with a black marker.
String the Flags Onto Cord
Create a length of cord that is approximately a few feet in length. String the cards by inserting the cord into the left hole, from the front to the back, and entering it through the hole on the right, from the back to the front. Starting with the “H”, string the cord through both holes. In the same way, continue in the same manner with each letter in the correct order.
If you would like to string all the letters and words together, you can do so using a single cord. You can also use a cord to attach each letter to its own cord for greater flexibility when hanging the banner so that you can hang them individually.
It’s time to hang it up
Your banner is now ready to be hung. It is time to start the birthday celebration!
Here is the link to the free tutorial
Image and Tutorial Source: makesomethingmondays.com